How to install french drain in crawl space
Spencer Turner • August 25, 2023

Installing a French drain in your crawl space is a proactive and effective way to manage excess moisture and safeguard your home from potential water-related issues. A French drain consists of a perforated pipe surrounded by gravel, designed to collect and redirect water away from the crawl space, preventing moisture buildup and reducing the risk of mold growth and structural damage. In this step-by-step guide, we will walk you through the process of installing a French drain in your crawl space, providing valuable insights and tips to create a dry and healthy living environment beneath your home.


Preparing for French Drain Installation: Crawl Space Assessment and Planning

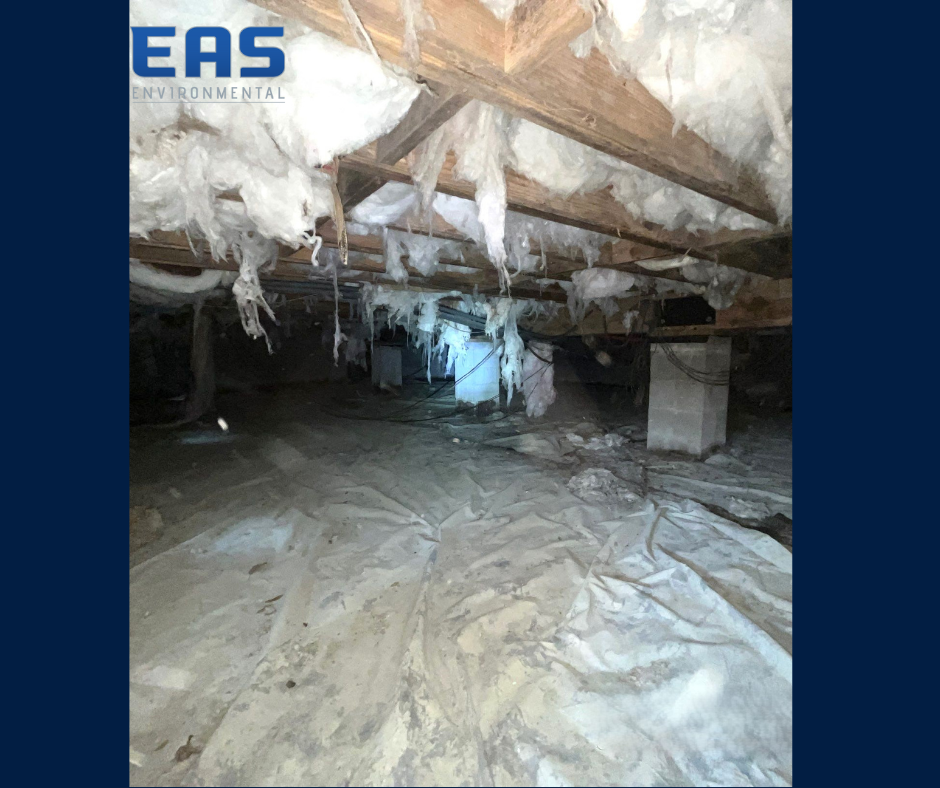
Preparing for French drain installation in your crawl space is a crucial first step to ensure a successful and efficient drainage system. Before diving into the project, conduct a thorough crawl space assessment to evaluate the current moisture levels, potential water sources, and areas that require drainage improvements. Look for signs of water infiltration, such as dampness, standing water, or mold growth, as these indicate problem areas that need to be addressed.


Once you've assessed the crawl space, create a detailed plan for the French drain installation. Determine the best location and route for the drain, considering the slope and terrain of your crawl space. This planning phase helps you identify potential challenges and allows you to design a drainage system that suits your crawl space's specific needs.


Additionally, decide whether you want an interior or exterior French drain, as each option comes with its own set of advantages and considerations. Proper preparation ensures that you have a well-thought-out strategy in place before commencing the installation, setting the stage for a successful project that effectively manages moisture and protects your crawl space from potential water-related issues.

Excavation and Trenching: Creating the Path for Your Crawl Space French Drain

Excavation and trenching are vital steps in the process of installing a French drain in your crawl space, creating the necessary path for the drainage system to effectively manage excess water. To begin, carefully mark the perimeter of your crawl space and use a shovel or excavation equipment to dig a trench along the designated route. The depth and width of the trench will depend on your crawl space's specific needs and the size of the French drain pipe.


As you excavate, ensure that the trench slopes away from the crawl space, allowing gravity to guide the water flow towards the designated drainage area. This slope is critical to ensure proper drainage and prevent water from pooling around the foundation. In addition to the primary trench along the perimeter, consider creating additional trenches to intercept water sources or address problem areas. Once the excavation is complete, you're ready to proceed with the installation of the French drain, positioning it in the trench to efficiently collect and redirect water away from your crawl space. By carefully conducting excavation and trenching, you create a clear and functional path for your French drain, enabling it to fulfill its purpose of effectively managing water and maintaining a dry and healthy crawl space environment.


Step-by-Step Installation Guide: Building Your French Drain in the Crawl Space

Building a French drain in your crawl space is a step-by-step process that can effectively manage excess moisture and protect your home from potential water-related issues. Following this installation guide will ensure a successful project and create a dry and healthy living environment beneath your home.


Step 1: Excavate the Trench

Start by carefully marking the perimeter of your crawl space and excavating a trench along the designated route. The depth and width of the trench will depend on your crawl space's specific needs and the size of the French drain pipe. Ensure that the trench slopes away from the crawl space to facilitate proper water flow.


Step 2: Install the French Drain Pipe

Place a perforated pipe in the trench, positioning it with the perforations facing downward to allow water to enter the pipe. The pipe should slope slightly to encourage water flow towards the designated drainage area. Fill the trench with gravel, surrounding the French drain pipe to create a channel for water to move freely.


Step 3: Cover with Landscape Fabric and Backfill

Cover the gravel and French drain pipe with landscape fabric to prevent soil from seeping into the pipe. Then, backfill the trench with soil, ensuring the pipe is adequately covered. Compact the soil gently to create a level surface.


Step 4: Monitor and Test

After completing the installation, test the French drain by pouring water into the trench and observing its functionality. Regularly monitor the drain to identify any issues and ensure that it effectively redirects water away from the crawl space.


By following this step-by-step installation guide, you can successfully build a French drain in your crawl space, providing an efficient and cost-effective solution for managing moisture and protecting your home from water-related concerns. Creating a dry and healthy crawl space environment helps safeguard your home's structural integrity and promotes a comfortable living environment for you and your family.

FAQs

  • Is it necessary to install a French drain in my crawl space, or are there alternative drainage solutions?

    While a French drain is a popular and effective drainage solution for crawl spaces, there are alternative options. Sump pumps, interior or exterior drainage systems, and the installation of vapor barriers are some alternatives that can also address excess moisture issues. It is essential to assess your crawl space's specific needs and consult with professionals to determine the most suitable drainage solution for your home.

  • Can I install a French drain in my crawl space myself, or should I hire a professional?

    DIY installation of a French drain in a crawl space is possible, but it requires a certain level of construction knowledge and skills. Homeowners with experience in drainage systems and construction may successfully tackle the project. However, if you lack the necessary expertise or have a complex crawl space, hiring professional experts can ensure proper installation and optimal performance of the drainage system.

  • How long does it typically take to install a French drain in a crawl space?

    The time required to install a French drain in a crawl space can vary depending on the size and complexity of your crawl space, as well as your level of experience. Generally, DIY installation may take several days to complete, including excavation, trenching, and backfilling. Professional installation may be completed more efficiently, as experts have the necessary tools and equipment.

  • What materials and tools are required for installing a French drain in my crawl space?

    To install a French drain in your crawl space, you will need a shovel, level, measuring tape, wheelbarrow, perforated pipe, gravel, landscape fabric, and backfill soil. Additional materials like a sump pump or vapor barrier may be required, depending on your crawl space's specific needs and the drainage solution you choose.

  • Can I install a French drain in an existing crawl space, or does it require a new construction project?

    A French drain can be installed in both existing crawl spaces and new construction projects. For existing crawl spaces, careful planning and excavation may be required to create a path for the French drain. Consulting with professionals can help determine the best approach for your specific situation.

Contact EAS Environmental Today!

EAS Environmental will do everything we can to ensure your experience with us is excellent.

CALL US NOW

Request A FREE Estimate

Request a Free Estimate Form

Checkout Recent Post

By Spencer Turner April 22, 2025
Asbestos was once hailed as a “miracle material” for its heat resistance, durability, and insulation properties. For decades, it was widely used in residential construction—particularly in insulation, floor tiles, roofing materials, and textured ceilings. However, as the severe health risks associated with asbestos exposure became evident, regulations surrounding its use began to tighten. So, when exactly did they stop using asbestos in homes? And when was it officially banned? The answer is more complex than a simple cutoff date. Asbestos Use in Residential Construction: A Historical Overview Asbestos use in homes peaked between the 1930s and the 1970s. It was commonly found in: Insulation (especially around pipes and ducts) Vinyl floor tiles and adhesives Roofing shingles and siding Acoustic ceiling tiles and popcorn ceilings Joint compounds and cement products Although concerns about asbestos exposure surfaced as early as the 1960s, it wasn't until the late 1970s and 1980s that its use began to be seriously curtailed. When Was Asbestos Banned? Contrary to popular belief, asbestos has not been fully banned in the United States. Instead, its use has been heavily restricted through a series of phased regulations: 1973: The EPA banned spray-applied asbestos-containing materials for fireproofing and insulation. 1977: The Consumer Product Safety Commission banned asbestos in wall patching compounds and artificial fireplace embers. 1989: The EPA issued a full ban under the Asbestos Ban and Phase-Out Rule—but it was largely overturned in 1991. Present Day: Many asbestos-containing materials are no longer manufactured or sold, but asbestos remains legal in certain products under strict regulation. Because of this phased and partial ban, asbestos-containing materials can still be found in homes built as late as the 1980s—and even later in some imported materials. How Do I Know If My Home Contains Asbestos? If your home was built before the mid-1980s, there's a high chance it may contain asbestos. However, asbestos is not dangerous unless it is disturbed and becomes airborne. Common risk scenarios include: Renovation or demolition of older homes Damage to aging building material DIY repairs involving insulation or flooring Professional asbestos inspection and testing are the only reliable ways to confirm its presence. What EAS Environmental Can Do to Help? A t EAS Environmental , our certified professionals specialize in: Asbestos inspections and risk assessments Sample collection and laboratory testing Safe asbestos abatement and removal Post-removal air quality verification We adhere strictly to federal and state guidelines, ensuring that any asbestos-containing materials are handled safely and effectively. Don’t Take the Risk—Test Before You Renovate Whether you’re planning a renovation or simply want peace of mind, understanding your home's asbestos risk is crucial. Ignoring potential exposure can lead to serious health issues like mesothelioma, lung cancer, and asbestosis. Contact EAS Environmental today to schedule a professional inspection and safeguard your property and your health. References: 1. U.S. Environmental Protection Agency (EPA) Asbestos Laws and Regulations: https://www.epa.gov/asbestos/asbestos-laws-and-regulations 2. Occupational Safety and Health Administration (OSHA) Asbestos Fact Sheet: https://www.osha.gov/sites/default/files/publications/OSHA3507.pdf 3. Consumer Product Safety Commission (CPSC) Banned Hazardous Products: https://www.cpsc.gov/Business--Manufacturing/Business-Education/Business-Guidance/Banned-Hazardous-Products 4. Agency for Toxic Substances and Disease Registry (ATSDR) Asbestos Toxicological Profile: https://wwwn.cdc.gov/TSP/ToxProfiles/ToxProfiles.aspx?id=30&tid=4 5. National Cancer Institute (NCI) – NIH Asbestos Exposure and Cancer Risk: https://www.cancer.gov/about-cancer/causes-prevention/risk/substances/asbestos/asbestos-fact-sheet 6. Environmental Working Group (EWG) Asbestos Nation Report: https://www.ewg.org/asbestos/
By Spencer Turner April 8, 2025
Our Core Values at EASE: THRIVE
By Spencer Turner March 5, 2025
Mold: it’s more than just an unsightly blotch on your walls—it’s a sneaky intruder that can compromise your health and home integrity before you even realize it’s there. At EAS Environmental, we deal with this hidden hazard head-on, combining expertise and empathy to restore safety and comfort to your spaces. Today, we'll dive into the nitty-gritty of mold—what it is, where it lurks, and why it’s a problem—plus, we'll share how our team ensures your environment remains healthy and wholesome.
By Spencer Turner February 24, 2025
At EAS Environmental, we believe that "Quality is Everything" when it comes to disaster restoration. Disasters are tough, but finding reliable help shouldn’t be. We understand that when you’re facing the aftermath of a disaster, you need a team that prioritizes high-quality work and quick, effective responses. Our motto, "Keep your mind at EASE," is more than just words—it's our commitment to delivering excellent service when you need it most. Quality is at the core of everything we do. From the first phone call to the final walkthrough, we focus on delivering top-notch results that not only meet but exceed your expectations. We strive to restore your property and your peace of mind with precision and care. This commitment to quality ensures that every restoration project is safe, secure, and thoroughly completed, allowing you to return to normal life as quickly as possible. Our team is our greatest asset, and teamwork is central to our success. We believe that teamwork makes the dream work, and this is evident in how we approach each restoration project. Our professionals work closely together, drawing on a diverse range of skills and experiences to deliver the best outcomes for our clients. We also hold each other accountable because we know the importance of integrity in our work. Responding positively to adversity isn’t just necessary; it's essential in our industry. We face challenges head-on, ensuring that every solution we provide is not only effective but also responsible. We listen to your needs and tailor our services accordingly, ensuring that each client feels heard and supported throughout the restoration process. Executing the mission means we do whatever it takes to get the job done right. Using the latest technology and techniques, our skilled and experienced technicians work diligently to restore every property to its pre-disaster condition. We're not just fixing buildings; we're restoring homes and businesses to create safe, welcoming spaces for people to return to. Choosing EAS means choosing a partner who understands the importance of quality, Integrity and Action, and customer service. We are here to help you navigate the difficult times that follow a disaster, providing support and high-quality services that you can rely on. Our focus on quality makes us stand out in the industry, and our commitment to our core values—teamwork, accountability, positive response to adversity, integrity, valuing the customer, and executing the mission—guides everything we do. At EAS, “Value the customer” is of priority to us. This client-first approach is part of our commitment to excellence and drives us to maintain the highest standards in every project. We are also committed to environmental responsibility and use eco-friendly products and practices whenever possible. This approach not only minimizes our environmental impact but also ensures a healthier, safer space for our clients and their families. In conclusion, at EAS Environmental, quality isn’t just part of the job—it's the foundation of our entire approach. We're not just restoring properties; we're rebuilding trust and peace of mind. When disaster strikes, remember to "Keep your mind at EASE" with EAS Environmental, where quality is everything and our team is always ready to deliver.
SEE MORE

Got a Question? We’re Here to Help.

You can arrange an appointment or make an enquiry by phone or email, orget in touch to us via our contact form.

CONTACT US TODAY